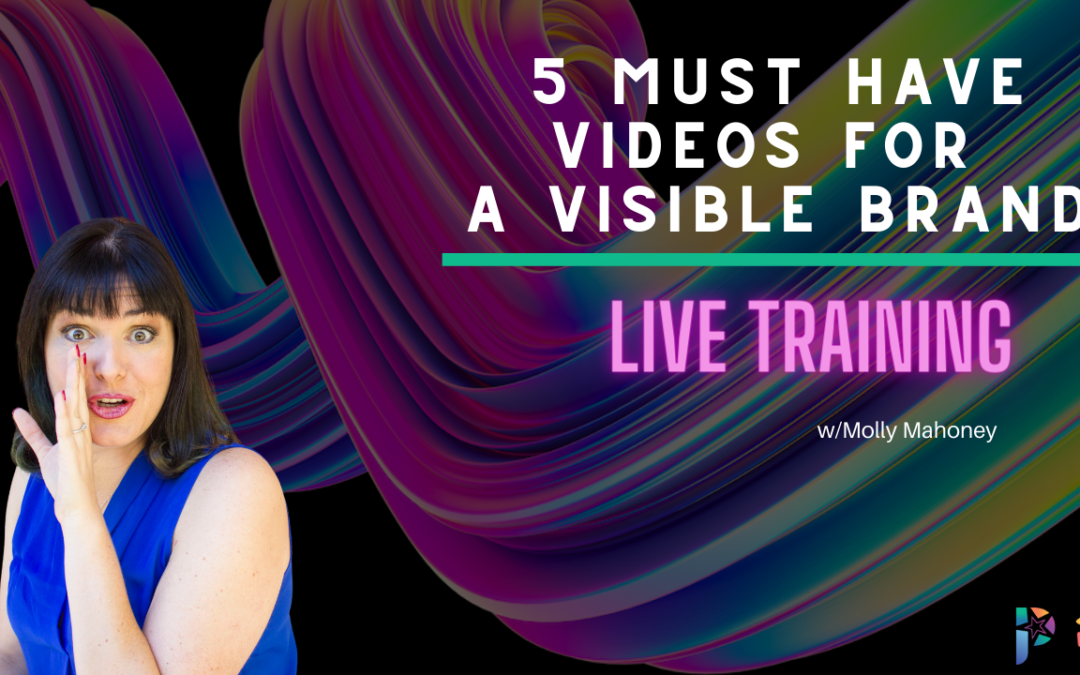
Five Must-Have Videos for a Visible Brand
Staying at the forefront of your client or customer’s attention ensures that you are the first person they think of when they need a solution you provide. And that means SALES! How do you maintain that attention? Well, a clear, thumb-stopping brand is a great way to do it. If you have a brand that clearly communicates your energy, values, and the benefit you provide for others, you’ll be more easily able to stay top of mind.
BUT a brand isn’t enough. You also need a way to get that brand in front of people… again and again.
Like a little subtle reminder – “Oh, Hey Friend! I’m here and you want more of me!” (aka sales) One of the best ways to do this is creating a suite of standard videos you can use throughout your marketing and content creation.
This week, our Live training will be a little different. It’s going to be WORKSHOP style. I’m going to walk you through these five types of videos, AND we will create them together!
We Love Implementing!
I personally love learning. I am obsessed with taking in new pieces of information. I have a slew of trainings, that I continue to go through. The catch is, if all you’re doing is learning without implementing, you won’t see results. With that in mind, we decided to begin offering more implementation workshops. We’ve had several bot-building workshops, and this week we launched our first content creation workshop.
Before we dive into the specifics of today’s videos, there is some prep work that needs to be done.
-
- First, identify what your brand energy is. What do you want your viewers to feel from your brand? My energy is electric; I know that is not the case for everyone. Do you want people to feel calm, joyful?
- What are your brand colors and fonts? A brand is more about the energy than the colors, but the more specific you can be with your brand colors, including hex codes, that will make everything so much easier.
- I remember someone telling me when they saw Wicked on Broadway. They knew it was going to be a successful show when they saw that the tape they were using outside was the exact same color green that they had in the logo.
- Do you have a logo ready to go? If you don’t have one yet, it doesn’t have to be rocket science. You can use Canva to create something basic, which is what I did. We hit seven figures before we rebranded.
- Your face is your logo, too. Especially if you are a personal brand, My sister says, you essentially signed up to be a model.
5 Must-Have Videos for a Visible Brand
Video #1: An Intro Video
I am way better at just getting my face on here and immediately talking, but now I have a video that I can use at the top of each one of my streams or a prerecorded video to add credibility to my brand. To follow along on as you read you will need to go inside the InVideo system! Go to this template link to find all the videos that we are covering today.
You can do your Intro Video with a wide video (which I recommend doing) or a vertical video (which you can use for Instagram Stories) or a square video. We did a standard video today so you could upload this media right into a livestream or edit it into other videos down the road.
Brand Presets:
- If you are following along you will now be in the InVideo system. If you haven’t used InVideo before, you may need to add your brand colors into the system.
- Click on “Brand Presets.”
- If your exact font is not in there, there are so many fonts you can choose from, so pick one that matches your brand. My font is not in here, so I picked one that looks similar.
- You will then upload your logo. You should upload a square version of your logo. You also want to have a transparent background that you upload as a .PNG file.
- Then you add your colors. You can either type in the number if you know it, or if you don’t know it, you can pick a color. I highly suggest you decide on very specific hex code colors for your brand.
- Input your Facebook page, Twitter handle, Instagram handle, and YouTube channel links.
- You can insert horizontal, vertical, and square end clips, too, if you like.
Layers
Back to the Intro template. Layers will show the logo, the website URL, and other things that are revealed in the background of this video. You can change the Revealer if you like. Click the lock in order to unlock the layer and edit it. You can change the colors and the animation of the revealer if you’d like. Then you can lock it again.
Project Colors
- At the very bottom, you see “Project Colors.” This is where I like to start when editing a template. It’s super customizable, so you can do anything you want. First, change out the colors at the bottom. If you click on “Brand,” it will change the colors to match your Brand Preset colors. You can also set “Custom” colors, which will bring in the template colors, and you can manually change them. Those changes will be input immediately into the video.
- Once you have set your colors, you can click “Play All Scenes” to see what the whole thing looks like.
Edit Logo
- If you want to change out your logo, it should be easy to change it. Click “Layers,” then click “Logo.” Go back to the “Edit” tab and replace my logo with yours. The assets you’ve uploaded will appear on the left. Select which version you want to use.
- Then you can click “Image Resizing Options.” The “Fit with Blur” option can be helpful in helping your logo stand out against a different image behind it.
- There are different “Animation” options. Hovering over each option will give you a quick preview of what that would look like. You can also set the duration of how long the animation will last. At the bottom of the screen, you can choose when the logo will come in. If you’re using my template, I don’t think you need to change any of these options, but I’m showing you how to do so in case you want to!
Text/Background color
- The next one down in Layers is “Text,” which we can use to update the website URL. Click “Edit” again to edit it. Update the text accordingly and click “Save” to see it in the video.
- You can also change the color of the Background, which you have to unlock accordingly. It’s black in the template, but you can change it to whatever color you want if there is a color that better aligns with your brand.
Export
- The next step is to hit “Export.” You can change the title to whatever you want, like “STR Intro Logo.” You can either download it, share the video on social media, or copy the link and share it with your team.
- Although we did create this Intro template for you, InVideo has tons of other Intro templates for you to utilize if you find one that fits your brand better!
Video #2: Promo Video
This one will be even more customizable because while the intro video has a circling thing at the beginning, this video features all of your own elements. If you are announcing something that’s coming up, you’re going to put the title of your video, the time of your video, and let them know that they need to comment for access and a reminder.
Title
- You can see all of the Layers on the right, and you can reorder which layer is on top, just like you can in any photo or video editing software. We select the top one first, which is the title of the video. Then click “Edit” to update the text to the title of your video.
-
- In the Style section, you can update the font size, line height, and so much more of each individual text box layer.
- In the Color section, you can update the text colors, which are different than the project colors.
- You can set up a Drop Shadow if you like, which adds a shadow behind your text, allowing your text to stand out a little bit more.
- You can Animate the text the way we did with the logo in the Intro video. You can set animation up by word, character, line, or the whole text box.
-
Images/Background
- When you update the image of me to be an image of you instead, go to your Uploads, and select an image you have previously uploaded of you with a transparent background.
- Instead of my background, feel free to change that to your brand; it’s another layer within the template. You can also add Stickers, which is super fun. In “Media” at the top of the left sidebar, you can search for videos or images to include that fit your brand energy. You can search by the copyright status of the image, too, which is super cool.
- When you’re editing an image, there is an option called Scene Media, where you can add a filter that lightens/darkens or blurs the images. So many other editing options that we didn’t explore today as well!
Scenes
- At the bottom, where you can see the timing of the whole video, you can see there are multiple Scenes. We were just playing with one Scene, which is essentially a frame. You can click on the next Scene, which is where I included the link for today’s video. You can keep that as a link if you like, or you can say something like, “Comment for access!” instead of giving the website. Up to you.
- The last scene includes my logo and my name. You can do whatever you want. Replace my logo with yours or a photo or whatever you want to use as your end scene. Edit all these things by clicking on each Layer in the Layers section, and then go back to the Edit tab for each individual element. If you don’t want an element, you can also just Delete the layer. If you don’t even want this final scene, click the three dots on the scene at the bottom of the screen, click “Delete,” and confirm that you want to delete it. Done!
Video #3: Testimonial Video
- It’s so much more dynamic than having just a static testimonial. You can use these all over in your marketing.
Video #4: Offer Video
- This is tapping into the problem and offers the solution, providing the link to the solution.
Video #5: “Snackable” Video
- We use videos like this after we go live. These are typically nuggets from a livestream that we clip and use in our marketing to entice viewers to check out our future live content or view our past live content.
Whether you use our templates, another one from InVideo or another template creator, you want to continue to get yourself out there and build your community. We know these 5 must have videos will help you do that! Check out THIS post for all the tips to professional branded videos and THIS post for how to re-purpose these videos once you have created them!
***Need tips on video gear? We have everything you need HERE
Additional Resources
- Be.Live (sponsor)
- Use code MOLLY for 30% off!
- Become a BeLive Partner here: www.Molly.live/belivepartner
- InVideo (template creator)
- Use code MOLLY50 for $5 a month!
- Access to all InVideo templates here.
- Canva
I’m Where are the timplates?not there
If we go to the link you sent will all or pictures be uploaded to your?
Ok awesome so the open is built into the template!
Sorry for 100 questions
Do they have music for you to use
yes and you get to pick it
Mandy Jo Rindhage thank you. Mandy you are amazing
thanks – just trying to help.
Mandy Jo Rindhage you are loads of help thanks
For someone like me who can’t even decide what I want to drink. This is going to be hard 3 hours for a 20 second clip lol
Is your background for this live from invideo
Even in mc Donald’s takes me 10 mins and I always end up eating the same thing lol
#Nugget be more decisive if you want to eat
Nugget: 1 Secret for success: Making a Decision.
How do you change the image?
NUGGET: Just decide!!
I’m late, you said you’re giving Templates?
http://www.molly.live/easytemp
Copy righted images do you pay for them
Wow so cool
It looks easy
My music fell off and I can’t figure out how to add it back
I love InVideo!!!!
Why clap?
so that her editor knows where to snip the speedy recap out of her video
Mandy Jo Rindhage silly question how is clapping going to help. Sorry for being thick
When you look at the video when it’s downloaded, you can see the spike in the audio section and go directly to where you want to snip.
Mandy Jo Rindhage oh thank you. So when you clap it looks like a mountain
Mark – yes
Will you please repeat the code for getting the replay. This was awesome as always.
Molly50 http://molly.live/easytemp
https://thepreparedperformer.com/belive
thank you and the show notes are where?
So to be able to make a video and use the templates you have to have an account?
yes you do, plus it keeps a copy of your videos
that’s it. Perfect. Thank you:-)
Visible
Hold on 5 dollars a month wow
you can also pay for a whole year at once
Mandy Jo Rindhage ok is it cheaper for a whole year
Mark Whittle yes 50% cheaper. With Molly’s code you can get the subscription for a year for just $60 ($5/month) and if you wanna buy monthly it will come down to $10/month
Yeah mine did that too
Click the button to the left of play
Now I fixed it I think
You have to play the entire scene to hear music
Yeah that’s today 🙂
They forgot a holiday! My 50th birthday is on the 30th. lol
Mandy Jo Rindhage happy birthday for the 30th
Thank you Mark!
welcome to 50 -Happy Bday!
Thank you Cindy!
Mandy Jo Rindhage your welcome
Super Dope!
WOOT WOOT!! Thank you!!
You are amazing. Thank you!
Workshop.
Do you need a really good computer to do this or can it be a dinosaur pc
a reg PC with 4GB RAM or more will do 🙂
So the intro video we can put into be.live?
Yes, you can 🙂
I think your computer is on strike. It needs a pay rise
Intro Video: http://www.Molly.live/easytemp
No link
Ok I have no clue where I am
you are on the business page
Yes it’s on the biz page feed 🙂
So the overlay is like a holding screen
Interesting!
Did you make the logo in top right a gif
Yuck sprout
http://WWW.MOLLY.LIVE/makeagif
Is it easy to make a gif for use techno dinosaurs
Ooh thank you
So you can also use this as a cover video for your FB page correct?
That would be amazing 🙂
VISIBLE!
Online customers
I would love a ring light
I would like a wow effect
Intro video
Question- So would you use the intro video before you are going live?
sprinkled
Sseko
You have a fantastic background. How are you doing that. I am with be-live
Thank you!! Arica Kirby made it! 🙂
VISIBLE …
Visable
Nelofer Childress check her out. I think BeLive might be something that is great for you!
Kate
Kendra
Thank you Molly-so awesome to see the inside systems to creating a logo and mesmerizing our audiences through the 5 types of videos!